
This post contains affiliate links. Read the full disclosure here

If you’ve ever worked with Photoshop before, you’ve probably heard the expression, “There are millions of ways to do one thing in Photoshop.”
It’s true. Especially when it comes to creating a circle photo with a transparent background (perfect for use in sidebars on sites, perhaps you’ve seen one?). The easiest way is to use the marquee selection tool to crop an existing photo, and be done with it.
I dislike this method for one big reason: It’s destructive. You lose the flexibility to move the image around. Once you crop, you’re done. You better like what you’ve done, or you’re doomed to go back and try, try again.
Using clipping masks solves this problem because you create the shape first, and place your image on top of it. You can make your image smaller, bigger, adjust the zoom, etc.
Plus, using clipping masks is a good skill to have for more complicated projects in Photoshop.
But I’m getting ahead of myself.
How to Create a Circle Photo Using Photoshop Clipping Masks – Video Tutorial
I made a video tutorial with step-by-step instructions:
How to Create a Circle Photo Using Photoshop Clipping Masks – Breakdown
And here’s a visual-text breakdown, in case you are a written-word learner.
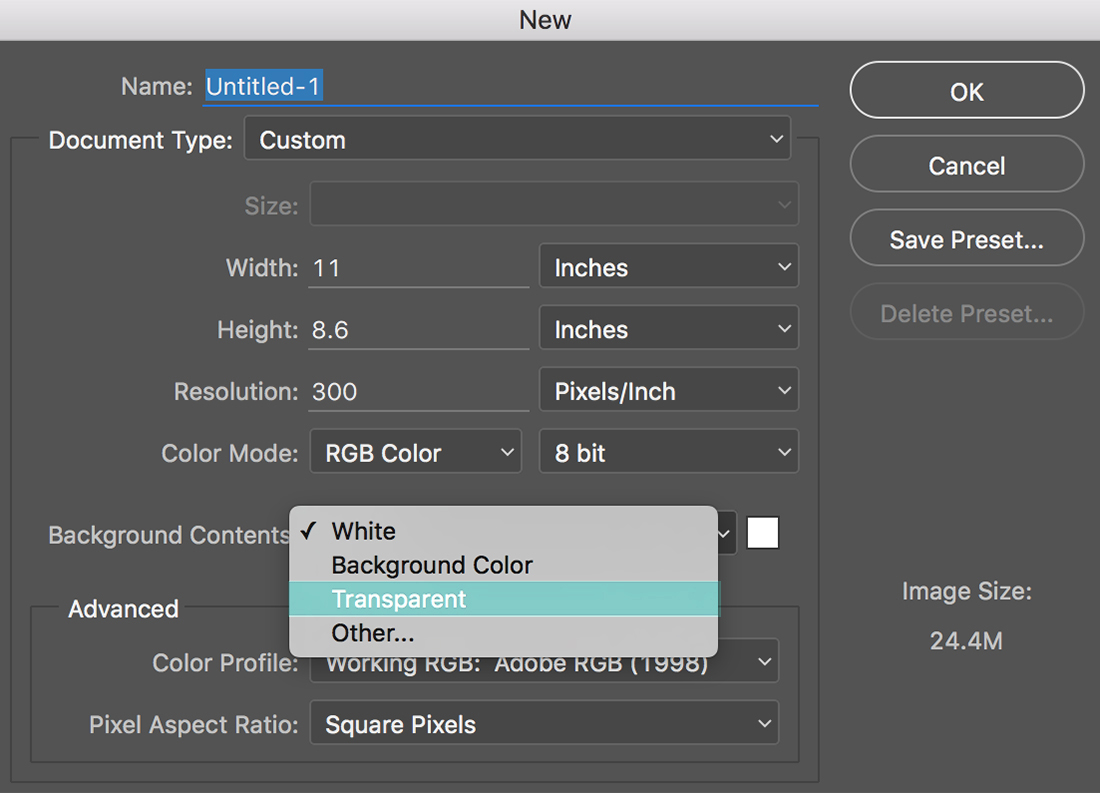
1. Start by creating a transparent file. Go to Window to open your “Layers” palette if it’s not open.
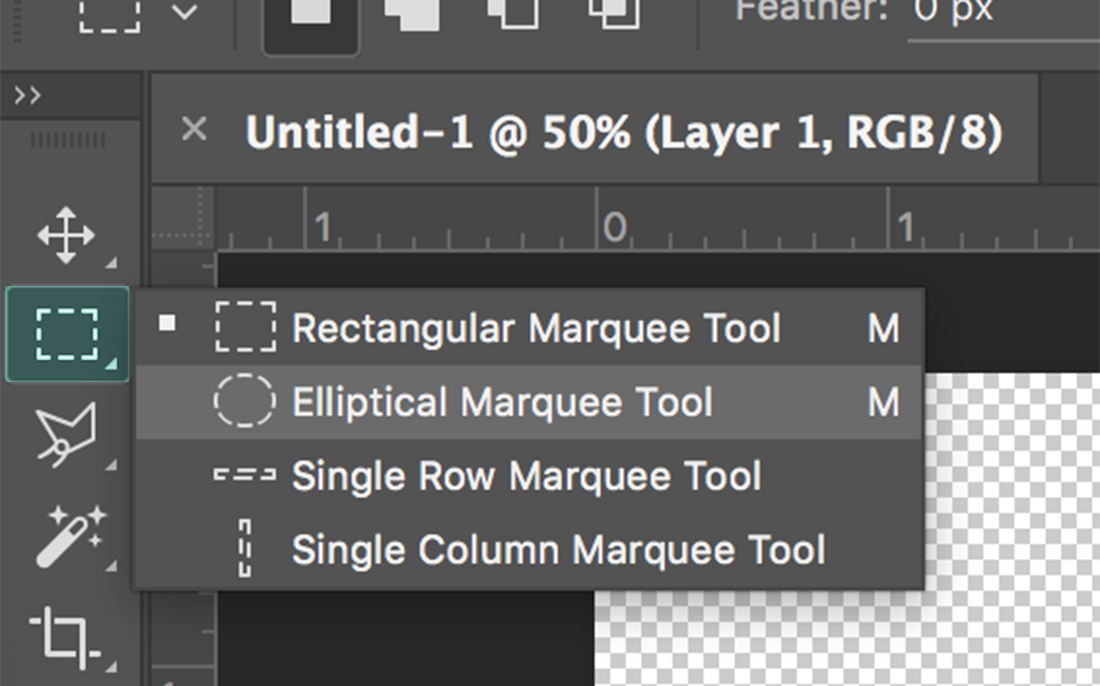
2. Create a shape with the marquee selection tool (there are other tools you can use, but we’re starting simple here). Add a fill color to the shape.
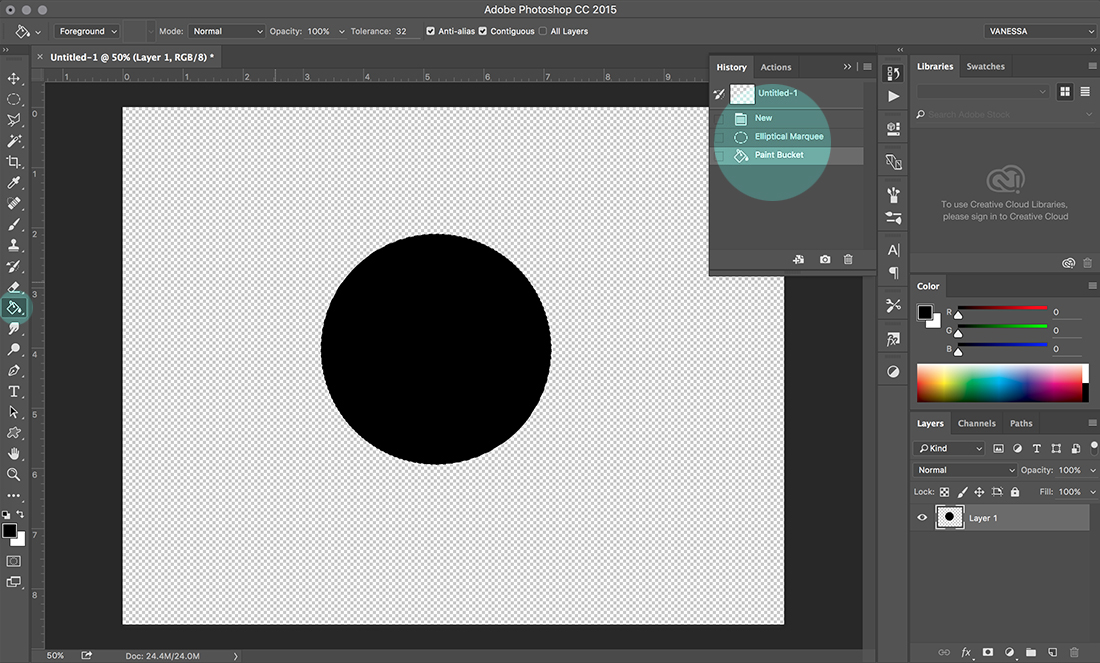
3. Deselect. To do this, click on the marquee tool again, then click on the shape to make your selection, aka “marching ants,” go away.
4. Open your photo and drag straight into your file. This will automatically create a new layer.

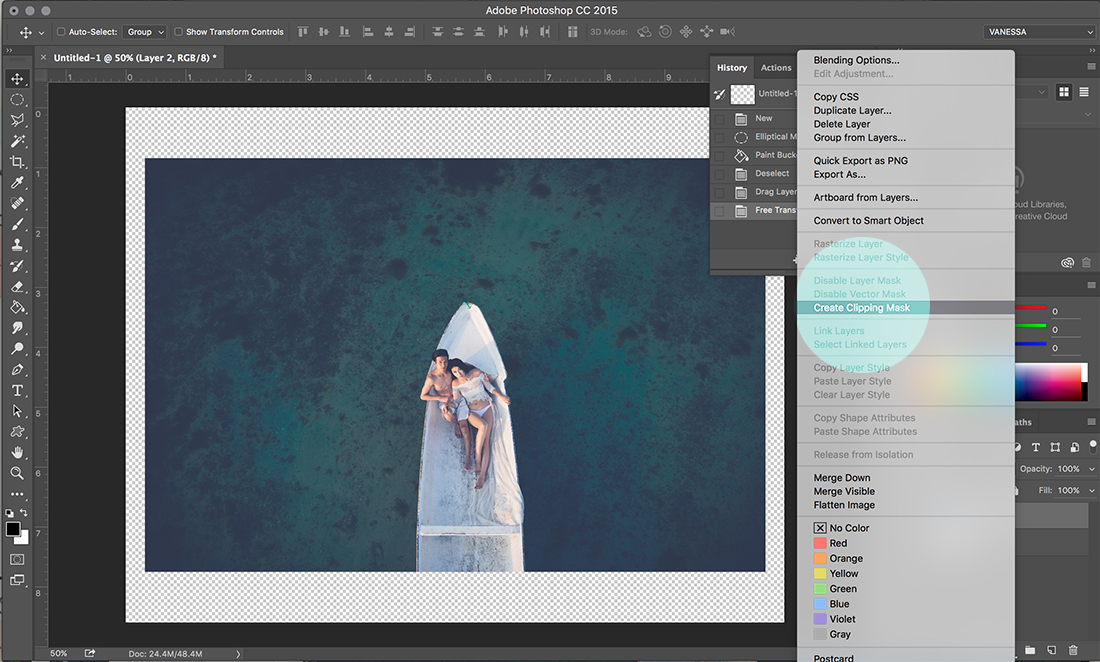
5. Right click on the layer, select “Create Clipping Mask.”
6. Move image around until you are happy with it. To resize, hit command + T. Then, hold down command + shift as you drag the corners in or out to contract or expand proportionally.
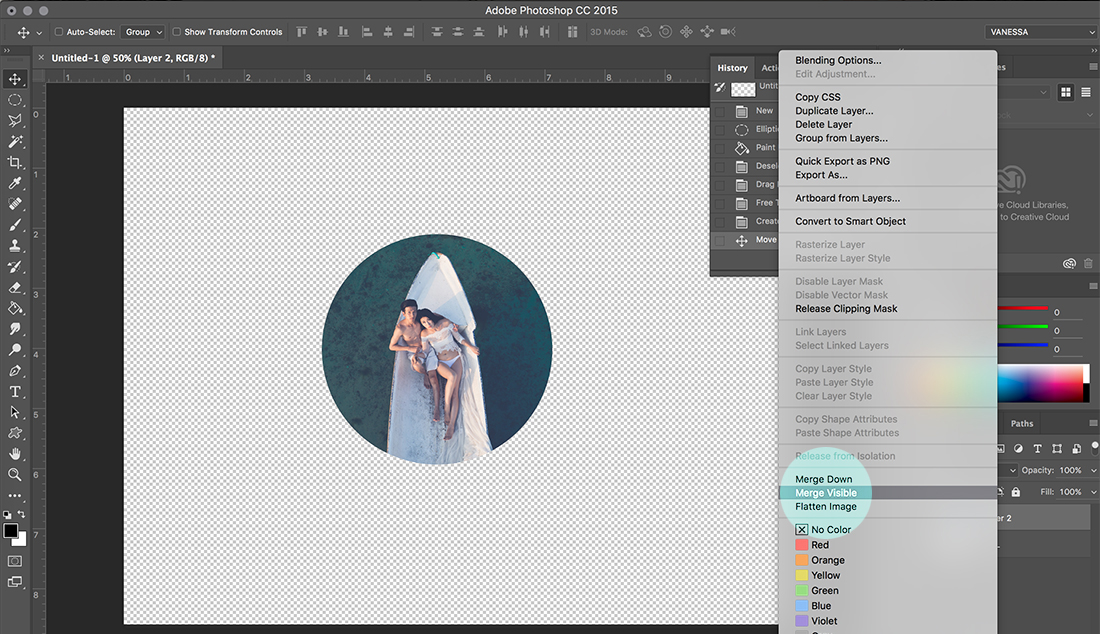
7. Save this as a PSD in case you need to make changes later. Then, right click on the photo layer, “Merge Visible.” (shortcut: command+E)
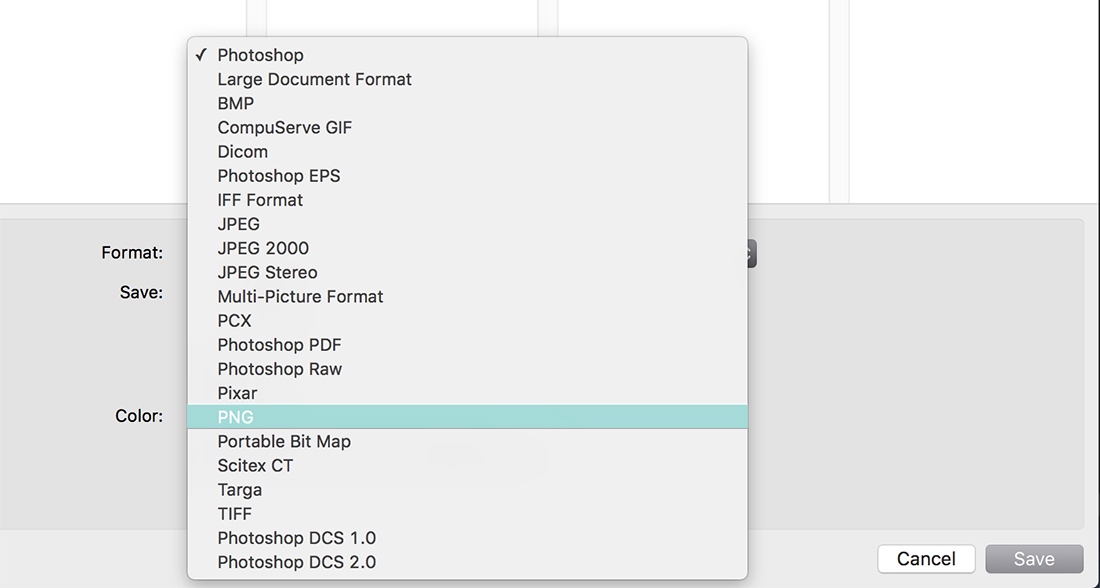
8. Save as a PNG file to keep the transparency.
Yay! Now that you’ve mastered this technique, you’re ready to work with multiple layers to create more complex Photoshop designs. Stay tuned (subscribe to my YouTube channel) to receive an update when I make a new tutorial.
What have you always wanted to learn in Photoshop? Tell me in the comments, and there’s a chance your query could be answered in a future quick & easy tutorial!
If you’ve ever worked with Photoshop before, you’ve probably heard the expression, “There are millions of ways to do one thing in Photoshop.”
It’s true. Especially when it comes to creating a circle photo with a transparent background (perfect for use in sidebars on sites, perhaps you’ve seen one?). The easiest way is to use the marquee selection tool to crop an existing photo, and be done with it.
I dislike this method for one big reason: It’s destructive. You lose the flexibility to move the image around. Once you crop, you’re done. You better like what you’ve done, or you’re doomed to go back and try, try again.
Using clipping masks solves this problem because you create the shape first, and place your image on top of it. You can make your image smaller, bigger, adjust the zoom, etc.
Plus, using clipping masks is a good skill to have for more complicated projects in Photoshop.
But I’m getting ahead of myself.
How to Create a Circle Photo Using Photoshop Clipping Masks – Video Tutorial
I made a video tutorial with step-by-step instructions:
How to Create a Circle Photo Using Photoshop Clipping Masks – Breakdown
And here’s a visual-text breakdown, in case you are a written-word learner.
- Start by creating a transparent file. Go to Window to open your “Layers” palette if it’s not open.
- Create a shape with the marquee selection tool (there are other tools you can use, but we’re starting simple here). Add a fill color to the shape.
- Deselect. To do this, click on the marquee tool again, then click on the shape to make your selection, aka “marching ants,” go away.
- Open your photo and drag straight into your file. This will automatically create a new layer.
- Right click on the layer, select “Create Clipping Mask.”
- Move image around until you are happy with it. To resize, hit command + T. Then, hold down command + shift as you drag the corners in or out to contract or expand proportionally.
- Save this as a PSD in case you need to make changes later. Then, right click on the photo layer, “Merge Visible.” (shortcut: command+E)
- Save as a PNG file to keep the transparency.
Yay! Now that you’ve mastered this technique, you’re ready to work with multiple layers to create more complex Photoshop designs. Stay tuned (subscribe to my YouTube channel) to receive an update when I make a new tutorial.
What have you always wanted to learn in Photoshop? Tell me in the comments, and there’s a chance your query could be answered in a future quick & easy tutorial!
John
May 12, 2020 at 10:02 amThank you for the well written tutorial!
SB
September 24, 2020 at 7:15 amGreat tutorial, quick question how can you have a piece of the image in the clipping mask poke out of the circle?
Vanessa
September 24, 2020 at 9:38 amWhat a great question — I will create a new post to address this, and send you an email when it’s posted!