This post contains affiliate links. Read the full disclosure here
I’m a big fan of the clipping mask in Photoshop. I use it A LOT.
A lot a lot.
In fact, I would say 80% or more of my projects end up with one or more clipping masks.
So I thought I’d share one of the simplest-ever tutorials with you today: how to put an image inside text in Photoshop.
If you’ve ever thought about making your own printables or art prints, you’ll find that this knowledge comes in handy.
YouTube Tutorial: How to Put an Image Inside Text in Photoshop
I created a quick 2-minute tutorial video that shows me filling text with an image using the techniques discussed in this blog post.
Keep scrolling down to read the step-by-step process.
Step by Step: How to Put an Image Inside Text in Photoshop
Follow along for a brief written-out tutorial with screenshots as your guide.
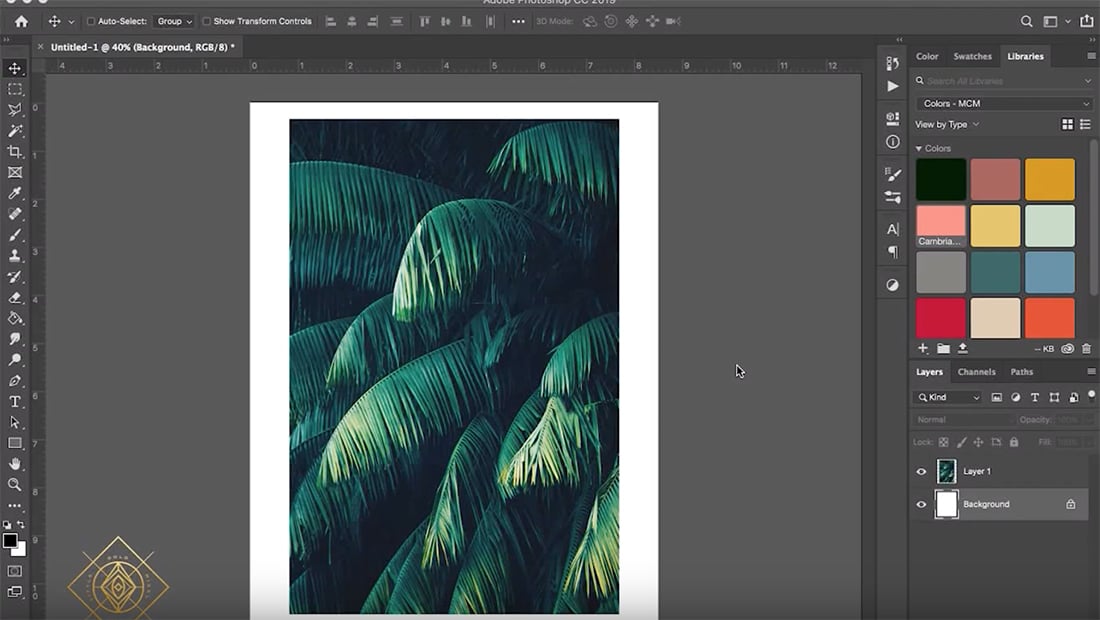
1. Place your image in a blank document.
First, I grabbed a free stock image for this project. You can also use patterns you’ve created or your own photography.
Before even getting started, I brightened the image because the original was so dark I knew it would be difficult to see. Go to Image > Adjustments to do any photo editing to your image.
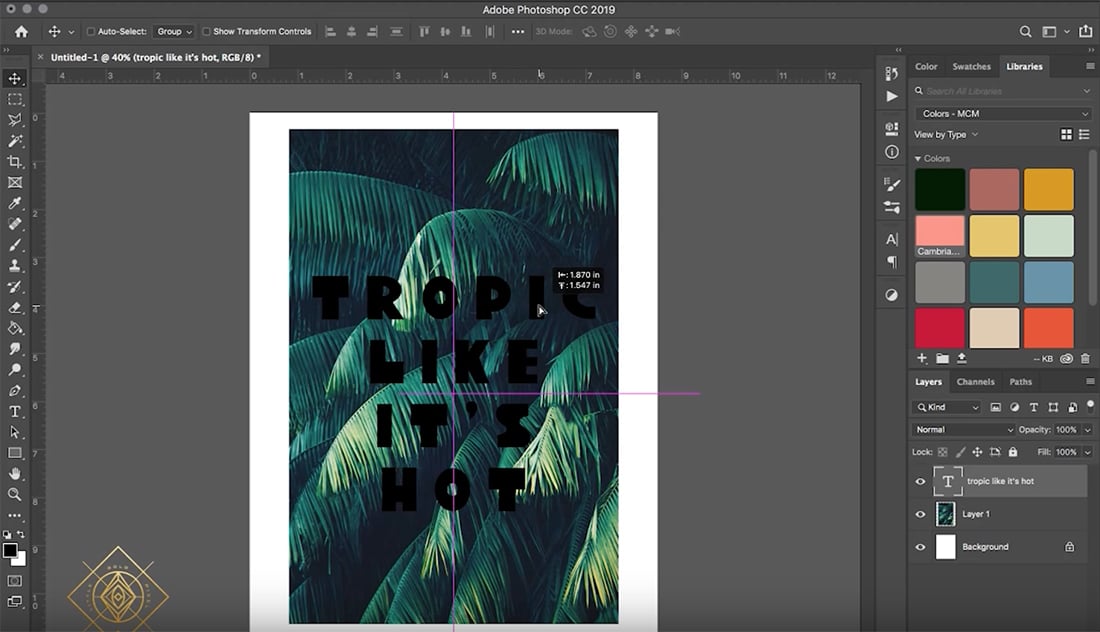
2. Pick a typeface and type in your words.
The point is to see the image through your text. For this reason, I like to pick chunky, thick sans serifs for the job.
The actual font you choose will be up to personal taste, of course!
Go to Window > Character to see your typography options and choose one.
Position the type where you want it. I centered my text, then centered it on the document.
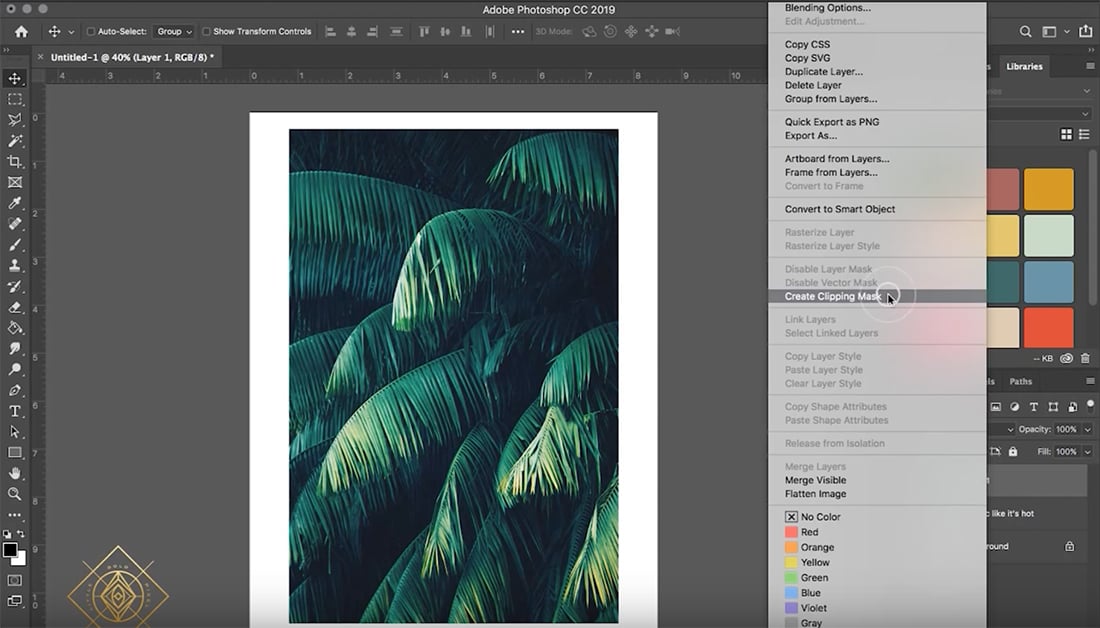
3. Move your image layer above the text layer and create your clipping mask.
Next, you’ll open up Window > Layers to see the layers of your document. You should have three: the background, the image and the text.
Move your image layer above the text layer if it isn’t there already.
Finally, select the image layer and Right Click > Create Clipping Mask.
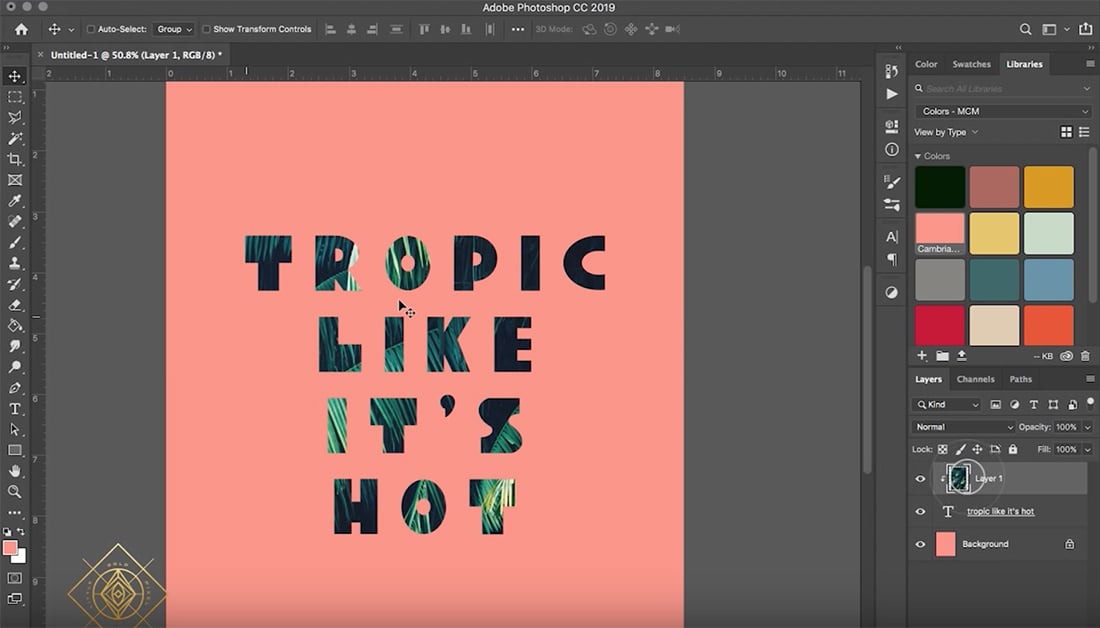
4. Make adjustments.
I wanted to create some contrast, so I changed my background color to a trendy coral. Now my green palms pop.
Adjusting the image layer within the text is easy. Just select the layer, the use your Move tool to drag and move around.
If you want to make the image larger or smaller, go to Edit > Transform to play with the size.
Some Examples: How to Put an Image Inside Text in Photoshop
Once you get the hang of this technique, the sky’s the limit with your creativity.
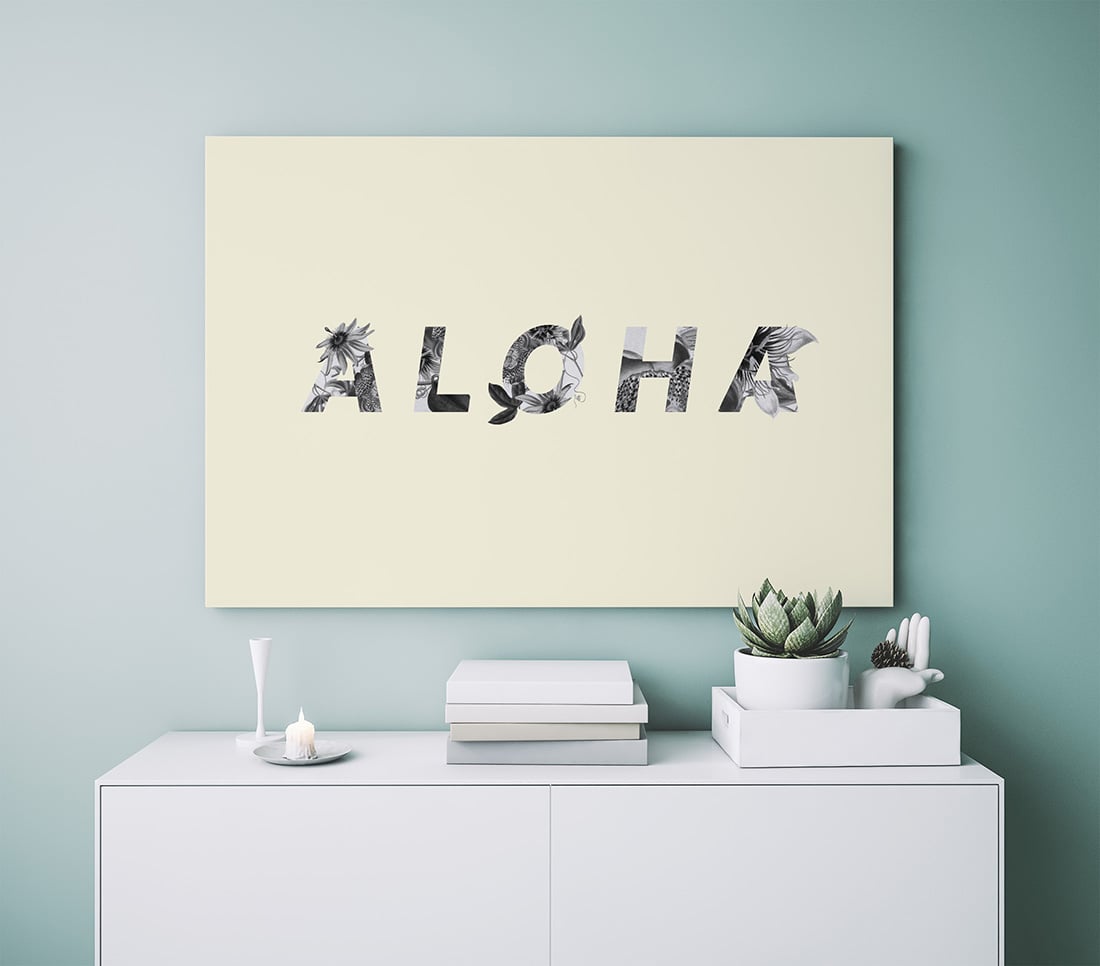
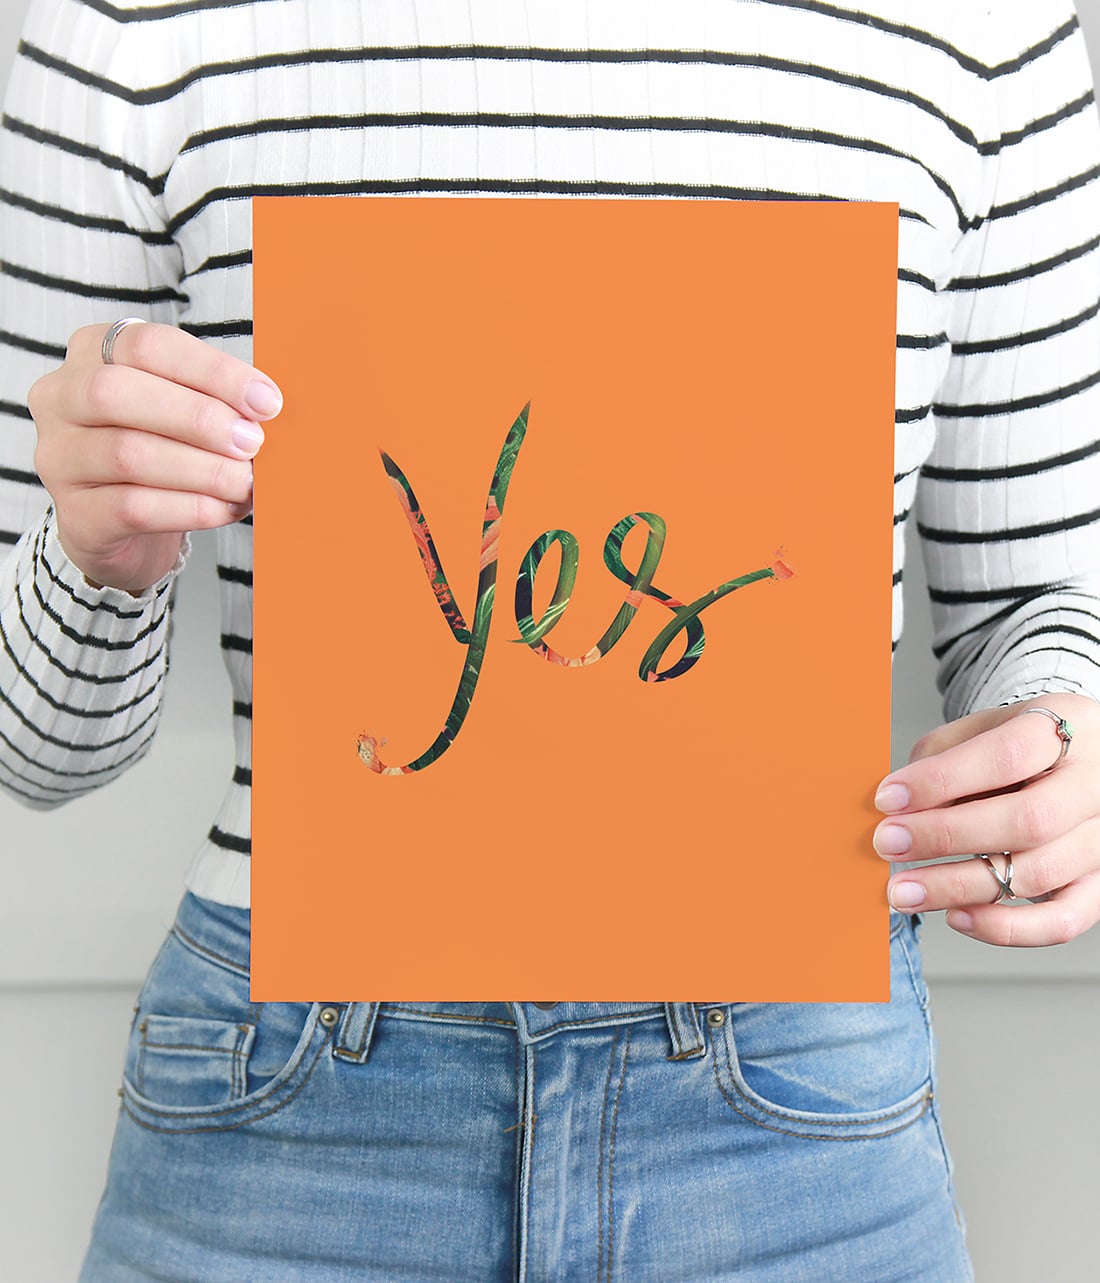
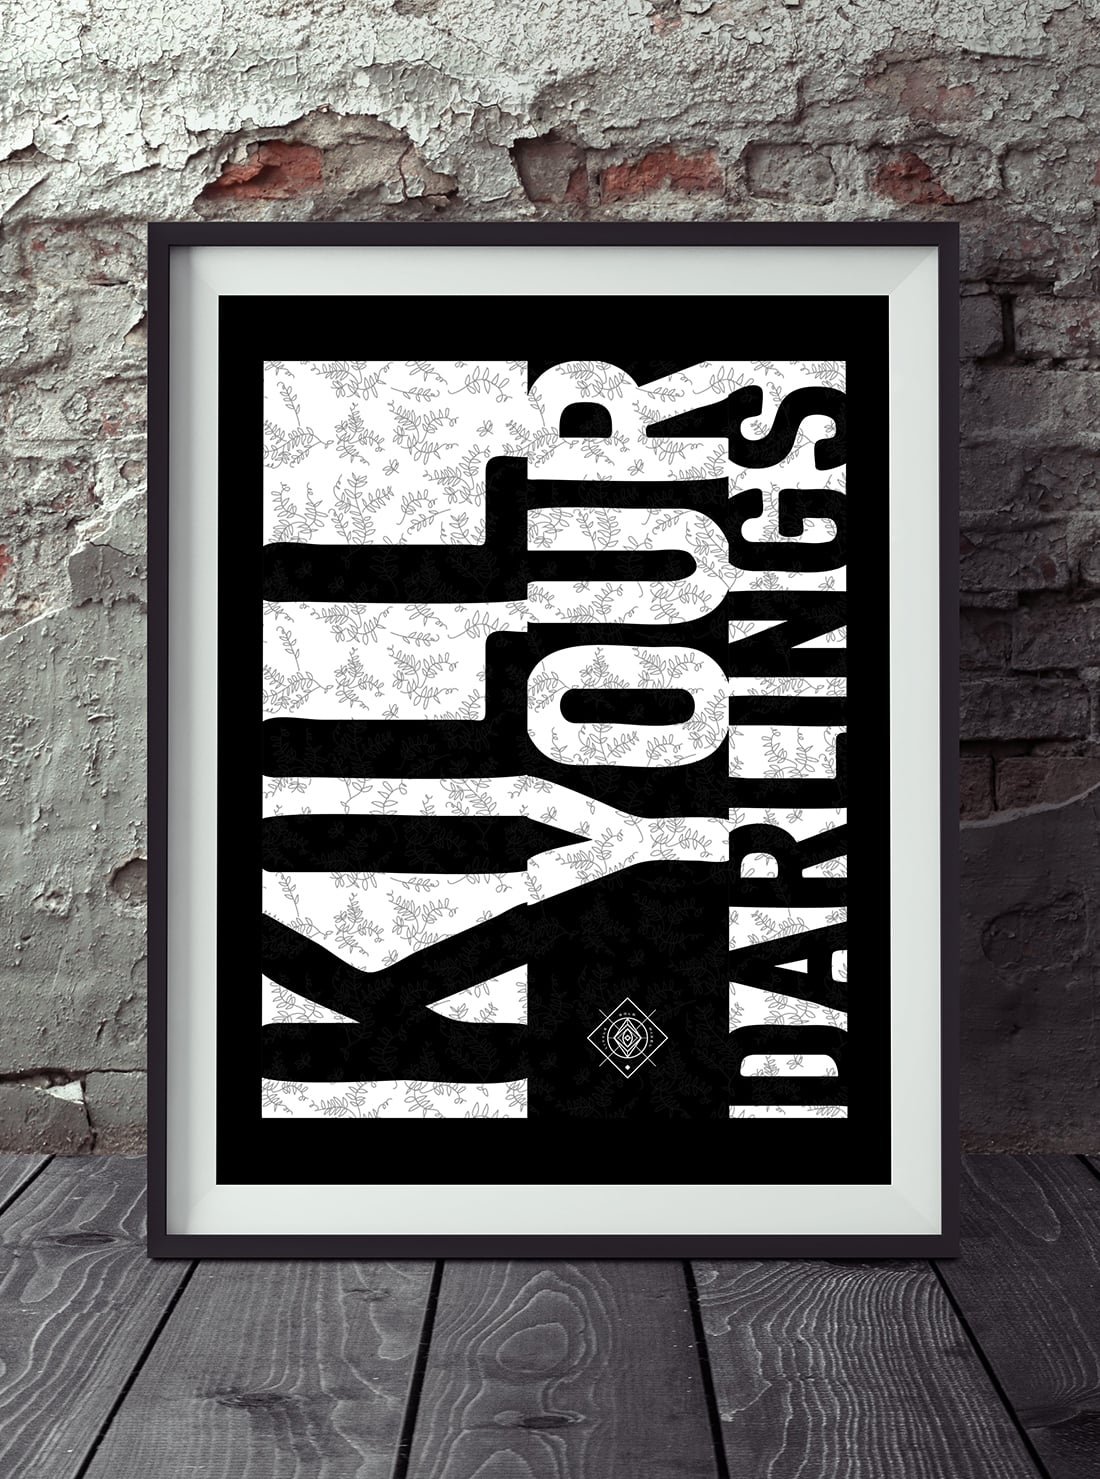
Here are some examples of art printables I’ve created using this method:
Bookmark this tutorial for later:
